
>What’s in YOUR sewing basket? Memorial Day organizing project. With Ikea.
May 31, 2011 § 7 Comments
>
Greetings meerkats and happy day-after Memorial Day!! Mr. Bug and I were pookie housebears on our day off. I embarked on a small reorganization of my sewing room that ended up with the inevitable trip to Ikea. In future sewing space news, Mr. Bug and I also measured our basement, currently a very strangely shaped unfinished cement box that will someday be a bright and cheery combination of family room, sewing space and poker-and-model train space, although if Lucy the hound has her way we’ll just cover the floor with pillows and call it a day. Here’s the result of our Ikea field trip… before and after. You guess which is which!


While the after (on the right) actually has MORE boxes than the before, some of those boxes have Mr. Bug-belongings in them, so this was a win-win trip for us! In the boxes I have my current projects, a box ‘o patterns and a box with supplies for stuff I make to sell on consignment. The basket on the side is for fabric scraps – much nicer looking than my previous grocery bag system! The drawers are for Mr. Bug’s treasures as is the giant box which is full of Drum Corp CDs… The previous sewing machine has been removed from the table. It has to go in for service and I may keep separate from the table as a space saver. Since I love seeing the insides of everyone else’s closets, I snapped a few more pictures to show all ya’ll meerkats how I have arranged my things. Also included: some super-messy out-takes and 70’s knitting-accessory fun.
On-the-wall storage
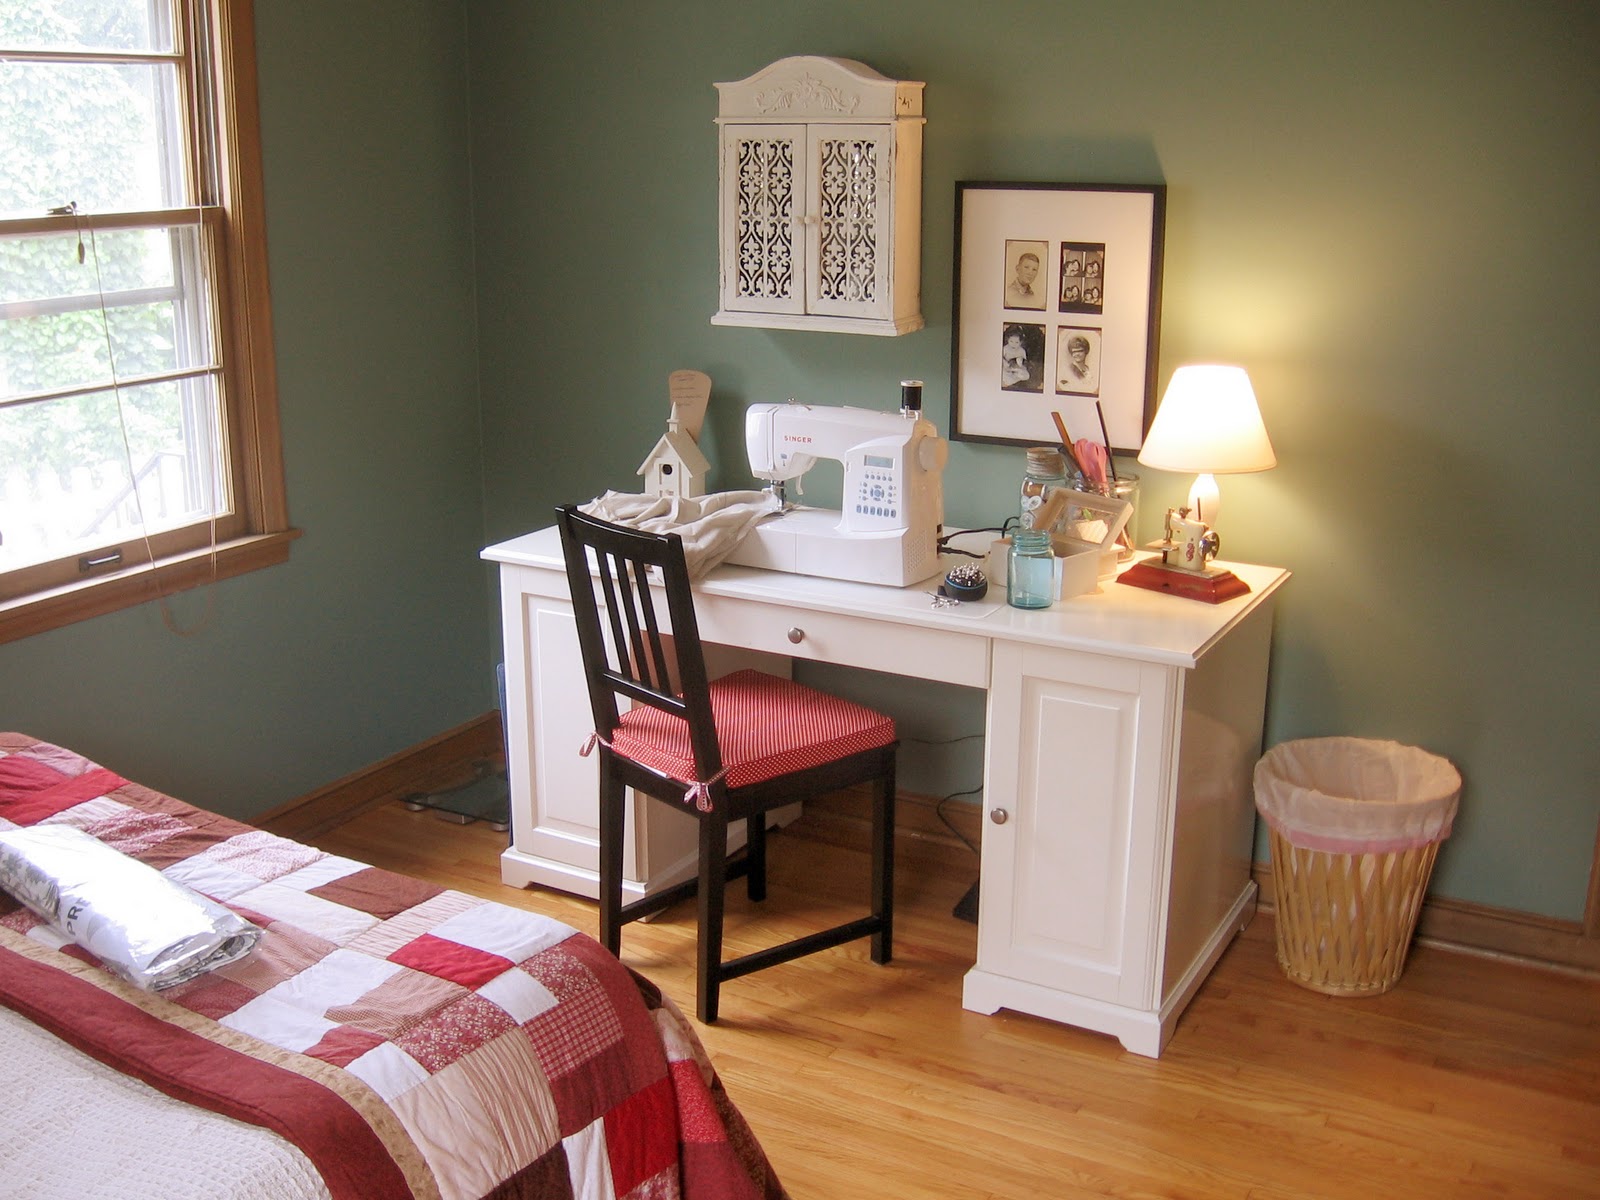
OK, so I neglected to take a full-length shot of my sewing desk, but for those who haven’t seen it before, I have a cute little white cabinet mounted to the wall above the desk. I’m a big fan of using mason jars for pretty notions and coffee cans for the not-so-pretty. My local super-fancy grocery store has a house-brand of coffee that is sold in these slightly smaller coffee cans and I usually drink el-cheapo french roast from the Target, but I also buy the pricey french roast from Kowalski’s to stock up on the cans!

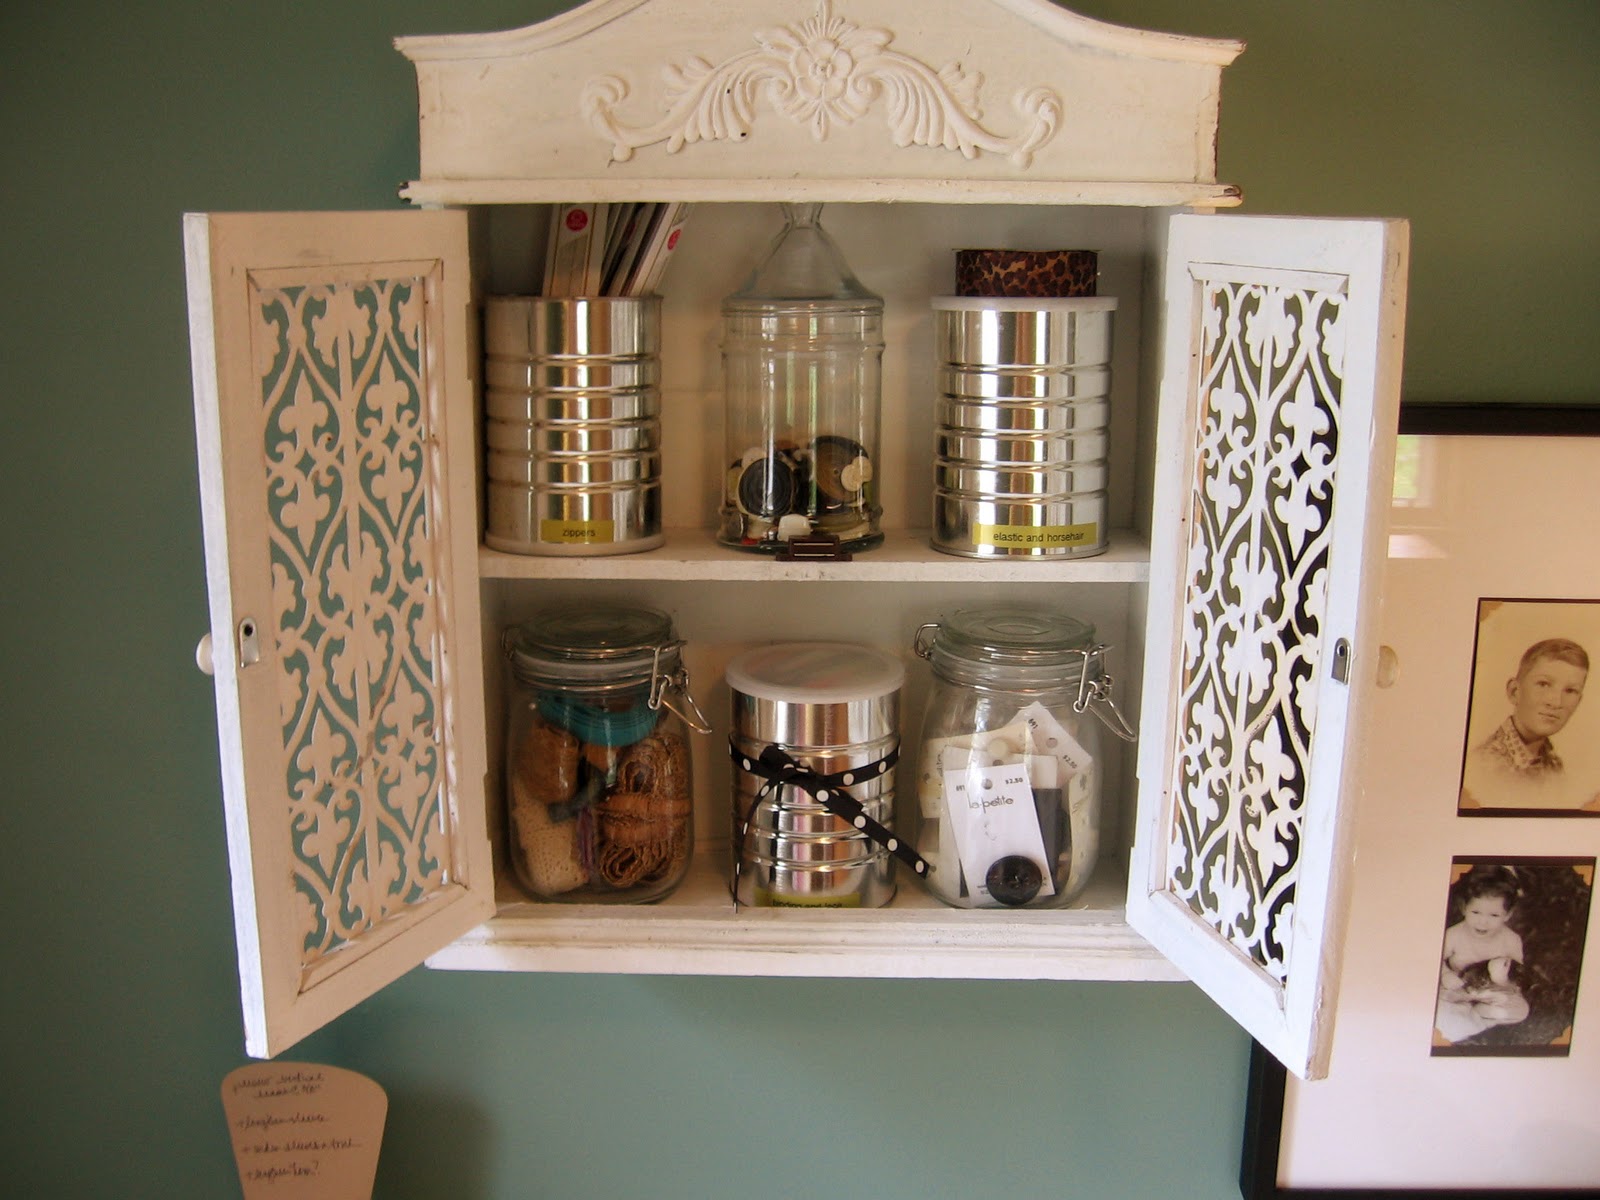
In the cabinet I keep things that I tend to use a lot. Top shelf: Zippers – the Coats’n’Clark kind that are wrapped in cardboard, with unwrapped ones would ‘round the coffee can. I keep my YKK ones strung on a safety pin and hanging so they don’t get kinked. In the center of the top shelf I have a little glass jar with labels and tags for clothes and consignment items, then an old spice jar (I think it had lavender in it) with bobbins. I obsessively tape the tails on my bobbins because I can’t stand the thread-nests! I have a can full of sewing machine oil and needles and then some glue and fray check. The bottom shelf is pretty much all buttons. One jar each of singles, mostly vintage, and one jar of buttons on cards.

Closeups! Here’s my sewing machine stuff. I’m a big fan of
Schmetz needles – mostly because I like the little plastic cases!

Labels, tags and bobbins…
On the desktop
Again, no full-length pictures, but let’s move on to the desktop, shall we? In addition to coffee cans and mason jars, I also love magazine files (from Ikea, of course) to help corral everything. Right now, I have three on my desk – one for TNT patterns, one for patterns, samples and handouts for classes and one marked miscellaneous that has my sewing machine manual, a couple of notebooks and other little things.

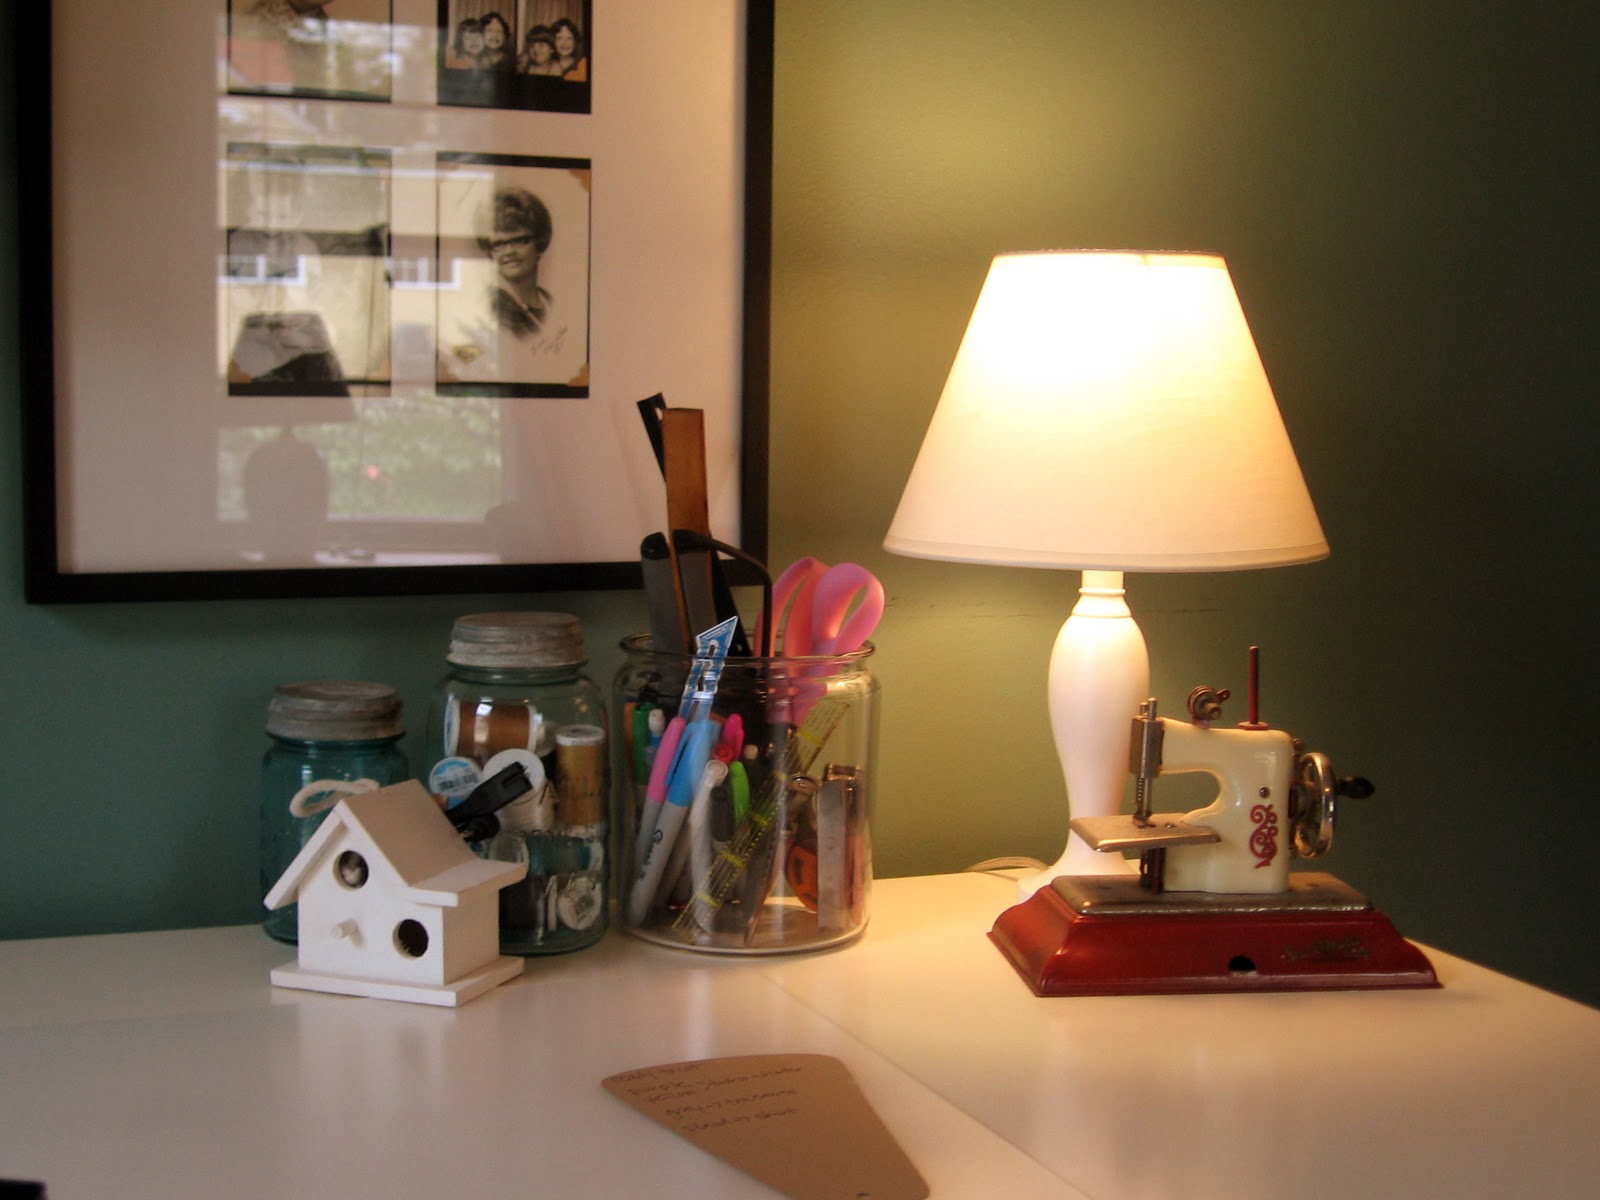
Next to the magazine files, more jars! Clockwise from 12 o’clock: thread, roughly organized by color, a jar with the makings for a black bead necklace I’ve been hankering for, mints (I’m addicted to altoids and the tins are good for holding pins’n’things!) and two half-done sewing kits in a jar for selling at the shop.

More jars! One huge jar with markets, scissors, rulers and other long pointy things. The dressed up coffee can is a misc-catch all

On the end of my desk is a jar for thread tails (my wrist pincushion is sitting in the mouth of the jar right now!), pincushion and my sewing box.

My sewing box is my main little toolbox without which I can’t sew. Mine is more robust than I’d really need if I just sewed at home, but since I go back and forth between my house and the shop I’ve found it’s better to be safe than sorry. Here’s what’s in it…

Top row
Clear elastic – I ALWAYS was finding myself needing just enough clear elastic to stabilize shoulder seams while at the shop, so I threw a whole roll in my sewing kit!
Jeanamajig – This little tool helps when sewing through many layers of thick fabric. I haven’t played with it TOO much.
Hand needles – in the pink pod – just a nice selection of needles! We carry these needles at the shop – the case is super handy.
Needle threader – the blue thing is a needle threader. My machine at home has a built in needle threader, but the ones at the shop doesn’t so I occasionally use this. It’s usually more trouble than it’s worth, though.
Twin needle – I keep one of my twin needles in my sewing kit – I kept having to buy ANOTHER one at the shop, so I thought it’d be nice to always have one.
Fabric glue stick – I’m a big fan of using glue to hold stuff together or to act as a second pair of hands. Helpful for turning up hems, doing flat-felled seams, etc.
White and black thread – Another item I kept having to buy at the shop, I just stuck one spool of each basic color in for emergency sewing!
Wonder tape – double sided water soluble tape without which I simply cannot sew. It’s super hard on needles (it make’s ‘em gummy) but SUPER useful.
Stay tape – this stuff is weirdly loosely woven, sort of like sew-in interfacing. I find I use it a lot!
Beeswax – I should really move this to my hand sewing bag, that’s when I use it.
Waxed cord – this stuff is super thick and strong and reminds me a bit of candle wicks or upholstery cord! I buy it for ten cents a ‘spool’ at our local fabric warehouse and use it mostly when I make pincushions (for the tufting.)
Bottom row
Presser feet – It’s hard to see the details, but the feet that I must carry with me are a the stitch-in-the-ditch foot, the invisible zipper foot (I don’t have a problem with the plastic kind!), a regular foot with clear plastic to see what’s going on underneath, an edgestitching foot and a blind hem foot. For the most part, these are feet that help me do more precise topstitching-type sewing.
Flash drive – I don’t use that often, but occasionally need to transfer files, so I just stuck one in my sewing kit!
White chalk – I bought this before I bought my favorite chalk marking tool. I still use it occasionally. It’s easy to hold! My main complaint was lack of precision. It’s good to use to rub the outline of something or for quick marks like marking a fold.
Chalk sharpener – pretty self explanatory
Chalk marking tool – Love mine – uses different pieces of (broken) chalk. Easy to switch colors and you can sharpen the chalk to make a very fine line.
Pencil – I use pencils to mark my fabric a LOT. I hate how the water soluble markers are hard to see and don’t work on a lot of fabrics. I’m just careful and made small marks. Good for fabrics (like quilt-weight cottons) that are white on one side and printed on the other.
Chalk – oops… I dropped my chalk refill! Broken! Mad!
Manicure scissors – these are Revlon manicure scissors. They’re annoyingly hard to hold (I have giant fingers!), but the tips are slightly bent, which gives a lot of control, and one tip is SUPER pointed, which helps when using to rip seams!
Seam ripper – I like mine, but honestly I use scissors more than the seam ripper for a lot of ripping! I always bunch up the fabric when using a ripper, no matter how sharp they are.
4 inch scissors – LOVE these scissors – super sharp, small, my fingers fit in the handle! These are a mid-range brand – I spent around $13 for them. I wish I’d ante’d up and gotten the Ginghers as my only complaint is that the tips aren’t quite sharp enough to cut notches – I have to cut further up the blade on flimsy or thicker fabric – makes it easy to cut too far.
Tweezers – Great for pulling threads when ripping out mistakes or for pulling tissue out from seams after using to stabilize. I was grabbing these from the medicine cabinet so often I just co-opted a pair for my sewing kit.
Thread snips – that’s them – the black thing next to the tweezers. Mine are Gingher’s and fancy, but I wouldn’t buy them again. They’re too ‘one use’ and I tend to use my little scissors more often.
Seam gauge – I have two of these and use BOTH of them all the time. Best sewing accessory ever! Most used to check seamlines, pin up hems, place buttonholes (that’s when I use 2!), pressing bias tape… the list goes on. I use the straight side to help press out the seams when I’m sewing french seams – helps on the second pass to not press a pleat at the seamline – just slide it in and gently ‘pull’ at the seam and press over the metal gauge.
Inside the desk…
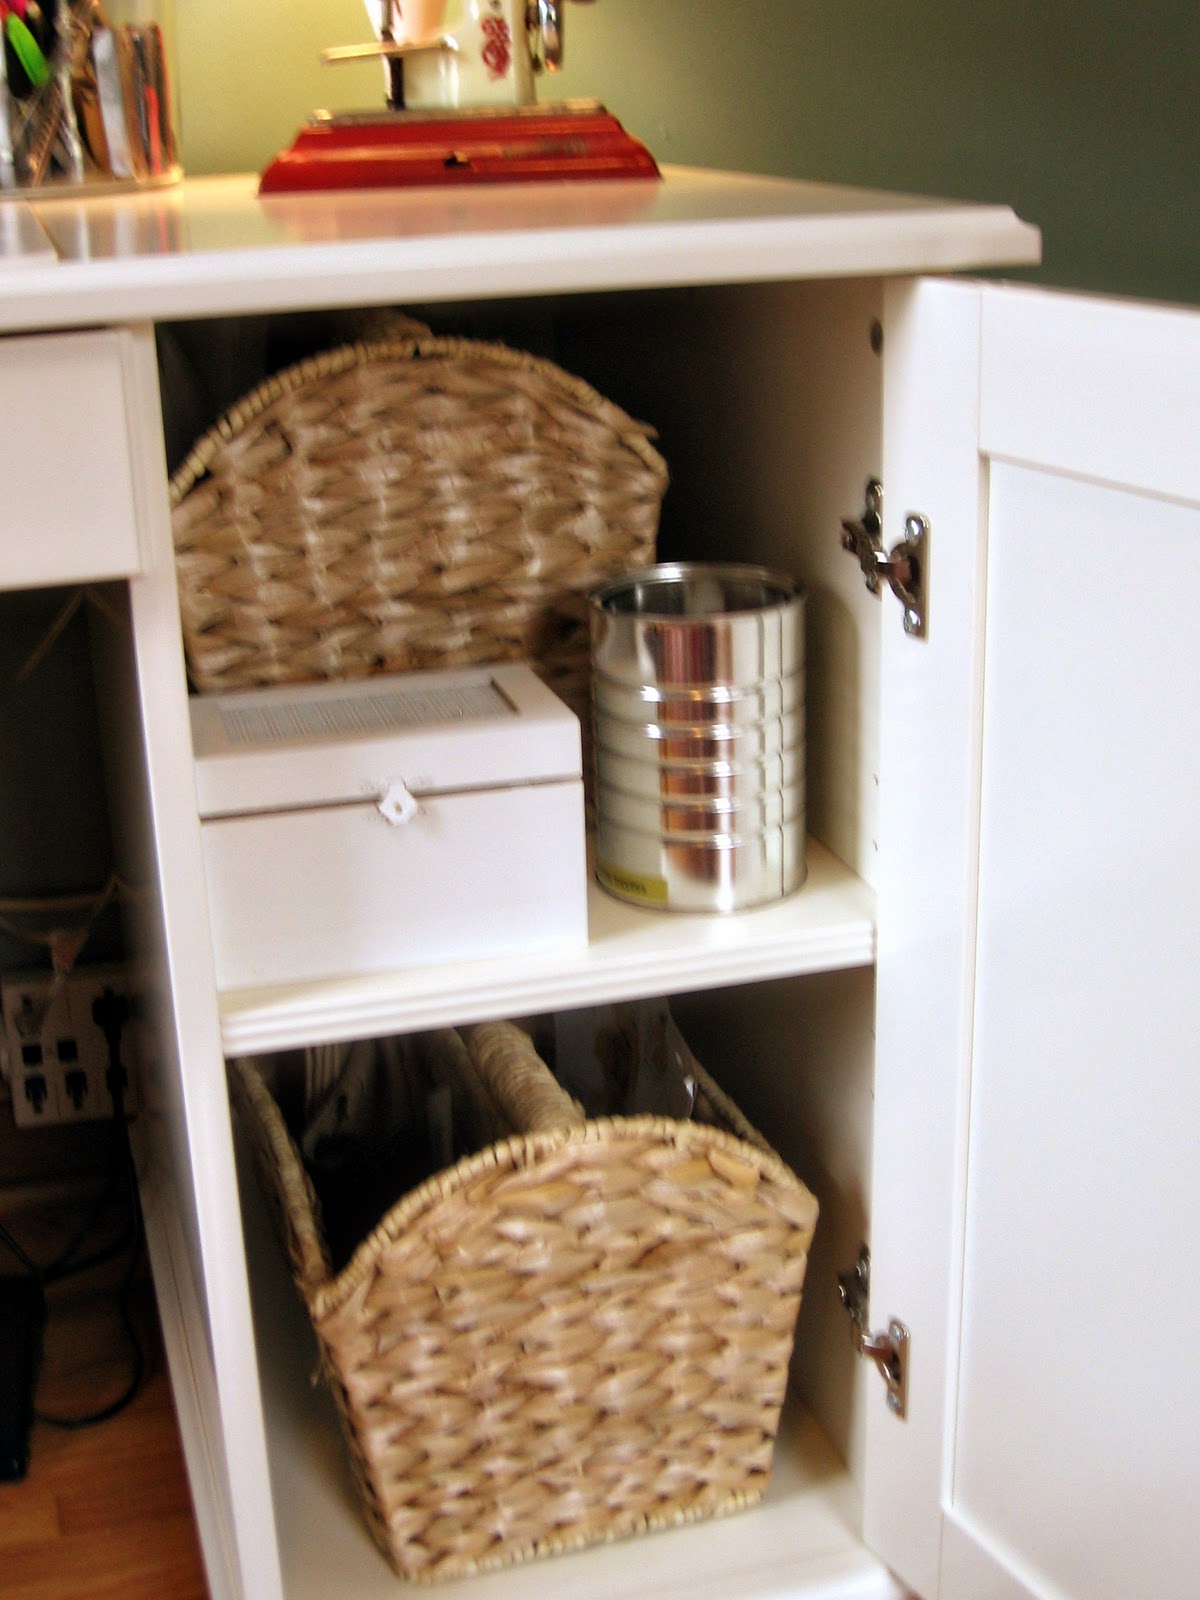
One of the reasons we chose this particular desk (also Ikea…) for the sewing room is that it has doors and adjustable shelves rather than drawers for storage. Super helpful! Here’s a shot of the inside of the right hand door.

The black pouch on the top shelf is my hand-sewing bag with all my silk threads, thimble, teeny needles and a pair of scissors. I hand-sewed for YEARS and am still the most comfortable doing that. I prefer silk thread for all my hand sewing and you can see I’ve got mostly the cheaper Gutermann thread, but I’m building up my collection of the more pricey Japanese stuff – all in the thicker buttonhole twist weight (30… um, pounds?) I prefer TEENY short needles because of how I hold my needle. They’re harder to thread and can only handle single strands of thread, but when I use a bigger needle it feels as awkward as trying to write with a big, fat kid-crayon!!

There is also a little white chest on that upper shelf that holds more hand sewing needles and pins.


if you’ve got a Target near you, the Target brand spices come in these super handy little bottles! I buy just for the bottles and wash ‘em up. Here’ I’ve got a few more quilting betweens and my scary curved needles stored in one. I’m probably dulling the tips by letting them hit the glass, but, oh well!!

The last two items stashed on the right side of the sewing desk are these two magazine baskets with my collection of quilt-weight cotton. I mostly use these to make pincushions and the like for consignment items, but you know how often little scraps are handy! If they’re this weight and bigger than 6×6”, they stay in the baskets.

Wanna see what’s in my drawers?
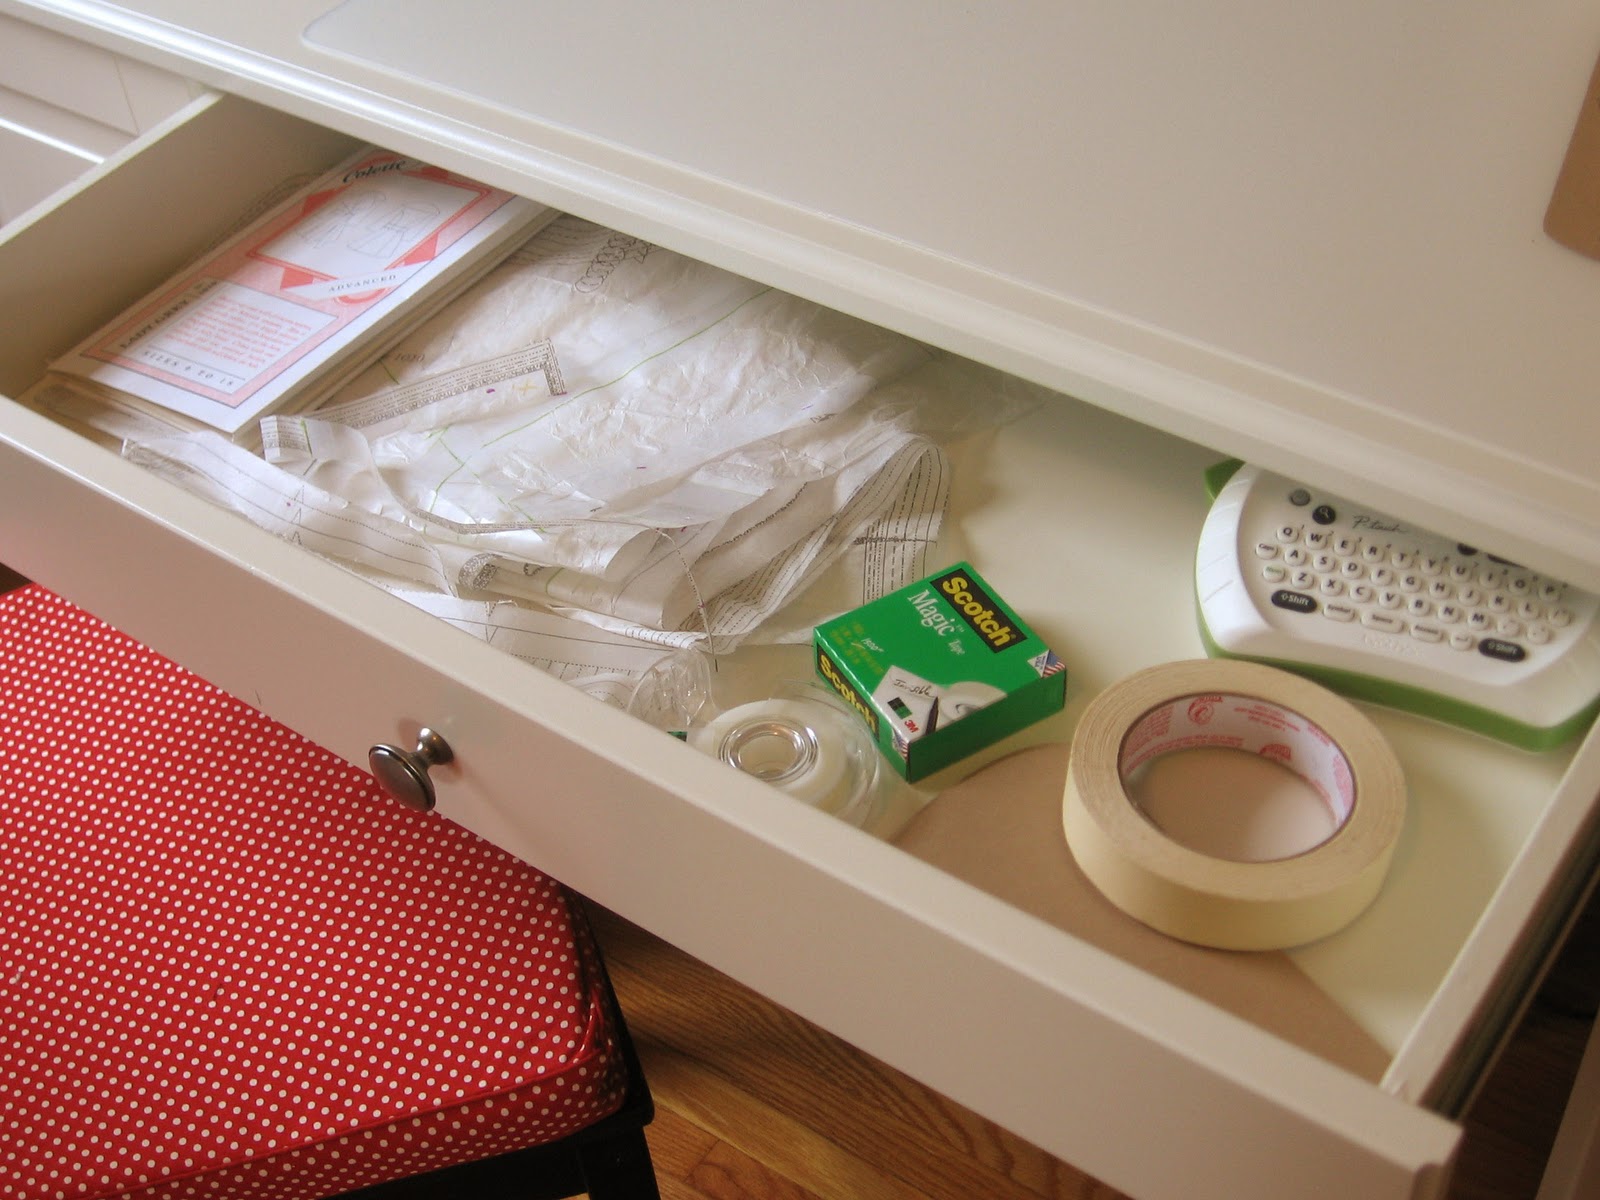
My center drawer is mostly for pattern adjusting materials as well as a few little office supply things. Post its are so helpful – when I’m topstitching I note down the needle position and stick it to my machine so I can remember what my settings were. I’ve also got a vat of mini binder clips that come in handy while sewing as well as for clipping pattern pieces together. I have sheets of pattern tissue good for adding tissue while adjusting patterns. I also cut a bunch of tissue into 1 inch (or so) wide strips and stuck ‘em in a bagggie to use as a stabilizer when I’m working on really thin fabric. To round it out, I have my roll of wax paper (my main pattern adjusting material), wax tracing paper and some measuring tools.

Ironing central
My ironing board is on the left side of my desk and part of my reorganization was to make a home for all of my ironing supplies. I originally had left room in the desk to stash my machine, but that rarely happens, so I decided to take over the always-empty sewing machine space and get rid of more clutter…

Now all my ironing stuff – tools and interfacing – are nicely tucked away, but close by!

My clapper, my spray bottle, some starch that I’ve never used but bought when contemplating working with polyester georgette… My naked ham (someone get that ham some clothes!!) and my pressing cloths. My main pressing cloths are (1) a piece of silk organza (2) a piece of wool (3) two pieces of muslin, one ‘clean’ and one that I use when putting on messy interfacing like weft insertion that sheds the adhesive onto the cloth.

I keep my interfacing in shoe boxes from Ikea. They were left over from an old organizing scheme, but they work well. I can see inside, they open and close with velcro and fit well in the space that I have. I have one box for sew-in, one for silk organza and one for fusible.

1972 called…
I also keep my knitting needles in my desk. I still use my grandma’s knitting needles and case. Isn’t it awesome?? I particularly like her scrap yarn-pull!!

Most of my grandma’s needles are the 70’s aluminum kind and they are hands DOWN my favorite. I love the way bamboo looks, but those needles tend to be too slippery and weird feeling for me. You can see I’ve added to her collection. Also, check out her labeling system!! I think grandma would have liked my label maker…

Overflow
Of course, there isn’t quite enough room in the sewing desk for everything I use on a regular basis. I’ve also got stuff stashed in the china hutch in our bedroom….

On the top shelf I have my covered buttons. I use these a LOT for sewing garments and other things.

To save space I take most of the button kits out of their packaging and put everything in a baggie – one baggie for each size. I also have some rings for doing the fancy Chanel-style covered buttons and a few vintage covered button kits stashed away.

Also on the top shelf is one of my two Longaberger baskets I was coaxed into buying many long years ago. This one is pretty handy with its insert! I keep twine, candlewicking thread, crewel yarn and embroidery thread in here. For the most part these are yarns that I use when I’m making pincushions. Messy, isn’t it!?

I’ve got this basket stashed on the second self as well (I brought it out into the light for better pictures!) On the left there are all the buckle kits I’ve collected. And a giant roll of elastic that is a sort of mystery. Why did I need such thick elastic?


My one regular sized coffee can lives in the hutch and is home to all my store bought bias tape, hem tape and rick rack. I keep the cardboard that comes in those packages and use it to wrap the bits of leftover trim around for better storage.

And finally, my basket ‘o trim. Here I’ve got bundles of lace, rick rack webbing, bias tape I’ve cut myself… all sorts of stuff. In the plastic baggies are bias strips of pink voile as well as bias strips of fusible interfacing.

And that, little meerkats, is that. But before I go… lest you think that my sewing room is all neatness and fairy kisses… here I am mid-organization. It’s not normally THIS messy, but the ironing board generally has a bunch of stuff sitting on it!!


Disaster!!
Disaster struck near the end of the day!! You can’t really see in any of the photos (barely, to the left in the photo just above…) but I have a nice set of hooks on which I hang in progress projects, to-do projects and mending, and totebags. Apparently, I need to work through my to-do list, because the whole shebang jumped off the wall last night and tried to kill me!! Stupid anchor bolts.

Organizational Porn
Really, I wouldn’t be where I am today if it wasn’t for my P-touch. I love you P-touch…

>Weekend TRAVEL edition– Happy Apple Day
October 11, 2010 § 2 Comments
>

Happy Apple Day is a tradition in our family. The first Happy Apple Day was in 1983. I was 9. My mom was 31. My father had died the year before. Due to a confluence of events, including opening duck season and the Bayfield Apple Festival, my mom and her dear friend Fran decided to gather their three daughters (me, plus Karen and Jenny, ages 7 and 5) together to make three bushels of apples into apple pies. I’m not entirely certain how they managed it, since we continue to have problems getting it done even with our 27 years of experience.
While we were all still in school we’d deliver the pies to old ladies from our church. We’d head out into freezing cold northern Minnesota October nights after a long, long day of rolling and cutting and mixing. We’d take Fran’s big old van that never warmed up. There was lots of freezing rain. And snow. Our mothers made us sing a song that they wrote especially for the occasion (lyrics: we wish you a happy apple day and a fine october… to the tune of we wish you a merry christmas..) It was like trick-or-treating. With elements of torture. These days, we just split the pies up and each take home our share. Sometimes I share with neighbors. Sometimes I just put them all in the freezer.
Over the years, Mom and Fran invited other friends. Sometimes I invited friends. None came for a second year. There’s a long string of half remembered jokes, stories told each year, slightly embellished. Well-meaning interested parties have suggested and sometimes procured apple-peeling tools that never work right – either falling apart or adding a level of efficiency that throws our assembly line pacing off.
We’ve had five weddings (two were my mom’s, one yielded us a new ‘sister’ and two grandkids to help.) There was one funeral (my stepfather.) Three new babies, one nearly hatched new baby, one trip to the emergency room, one terrible error in transposing the amount of sugar and flour needed, yielding over 40 less-sweet and more gummy pies (that was my fault. they will never let me forget.) Every year we are forced to perform amazing feats of mathematics in order to determine how many previous Happy Apple Days there have been. My mom and Fran have started to accuse ‘us girls’ of plotting to put them into nursing homes and use their impending dementia as a get-out-of-Happy-Apple-Day free card.
Last year, we tried to make a pie out of a baby.
Most years, we make three bushels of apples into pies. That’s around 50 pies a year, 1400 pies total. This year we took it a little slower and only made two bushels into 37 pies. It took the same amount of time. Our bell curve of efficiency is in a downward spiral with our most productive years (the post-college, pre-procreation period) long past. There are babies around again and so far, they aren’t proving very useful. And there are basset hounds. j
j
[note the use of my new apron!]
I have seven pies in the kitchen. Seven pies minus one large piece that I just ate, even though truth be told, a lifetime of super-apple-pie production has given me a distaste for apple desserts in general.
It was a good Happy Apple day. We found a bed and breakfast that allows basset hounds.
Two nice ladies bought the B&B three years ago. They left the city. They make delicious breakfasts. And soap. In November they’re opening up an antique shop in their barn. 
Lucy liked it there. She had six dogs to play with. They all had better manners than her. She would like it if we would obtain a similar B&B for her to live at.
The best part, of course, was the pies!
[Happy Apple Day!]
>Weekend edition – a House and Garden Post – the new sewing corner!!
September 25, 2010 § 14 Comments
>The weekend’s back, which means I’m veering from the daily sewing musings to talk about my house. I had intended to post Part II of how to build a windowseat out of Ikea things to keep your basset hound from sitting on the kitchen table this weekend, but I’m so excited about my new sewing spot that I just can’t wait! Perhaps we’ll get back to the windowseat tomorrow!
So, without further ado, here it is! My very own spot for sewing!!
 |
| [a partial room of one’s own] |
This sewing space has been coming for a while, now. We are lucky enough to have our own home, but it’s relatively small – 2 bedrooms, an unfinished basement, less than 900 SF. Typical south Minneapolis ranch house with tuck under garage. Mr. Bug and I both like things to be neat, tidy, hidden away. A trip to Ikea for organizational accessories and Swedish meatballs is a pretty hot date for us! So, not surprisingly, my sewing hobby has caused a little contention over the last few months. I’m always in the middle of a project and even though I like things tidy, I care a little less when it’s my mess. That I’m using.
Here’s how I worked before. First, I co-opted a corner of the counter in the kitchen (OK, half the counterspace in the kitchen) with my workbasket, piles of materials and pattern pieces, which I like to keep out for reference when I’m working on something (I hate marking cut material and always have to refer back to the patterns.) Sewing machine on table, with even more sewing stuff all over the place. Like this…
 |
| [sewing hurricane] |
Lately, it seems like the only time I ‘clear’ the kitchen table (put the sewing machine on one of the chairs) is to cut fabric!
I’ve been setting up the ironing board in the living room. I do a lot of my pattern alterations in the living room on the ironing board. I inevitably end up piling things on the loveseat while I’m working. It’s not quite as bad as the mess in the kitchen – but it’s hard to sweep! (A daily basset-hound-induced occurrence…)
 |
| [living room sewing annex] |
We’ve talked about what to do about the sewing mess over the last few weeks. One idea was to set up in the basement. But it’s cold down there, and more importantly, as much as I wanted a dedicated (out of sight) place, we like hanging out with each other in the evening, and I hated the the idea of being down in the basement (the COLD basement) in the evenings, out of earshot from Mr. Bug! I briefly campaigned for a complete switchover of our guest bedroom to a sewing room (I believe a futon idea was dangled…), but we like to have space for our guests! We ultimately decided to see if we could find something that wasn’t super sewing-room looking to replace a not-very-well utilized sideboard in the guestroom that was just a landing place for unused stuff and game storage. Here’s how it looked before…
 |
| [paper products were recent additions from a Target-shopping trip!] |
We decided to get the Liatorp desk from Ikea. It was a little on the pricey side, but we thought it looked like our style, it was nice and big, with a sewing machine hidey-hole and when we finish my dream-remodel of our basement and I have a REAL sewing space in our new family room, this desk will be useful for something other than sewing!
Here are the details – on the left side***, there’s a nice sewing machine den. On the top shelf I have a basket for my current project stuff…
**Also pictured, a little birdhouse left over from wedding stuff. Clothespin hot-glued on the back. Good for holding notes, pattern pieces, etc.
*NOT pictured – our cordless hand vacuum is mounted to the wall right next to the desk! Cordless hand vacs are an AWESOME sewing accessory!
 |
| [A perfect fit for the sewing machine! And a place to hide current projects out of sight] |
One of my favorite parts of the new sewing corner is that I was able to put the cute little white cabinet (a Christmas gift from Mr. Bug) to great use! I mounted on the wall, and used my coffee can collection**, a glass jar I already had and two snappy-top glass jars to store notions close to my workspace, but off the surface of the desk. Top row, left to right, I have zippers, loose buttons and elastic and horsehair braid. Bottom row, left to right, I have trim, bias tape and hem lace (still in the packages) and buttons on cards. I tried to use glass jars for the cute things, both for the cute factor, as well as to make it easy to see what I have. If I don’t see it, I don’t use it.
**The coffee can with the ribbon was a wedding-leftover. I’m not that cute that I wrapped the coffee can specially for the photo shoot.
 |
| [my coffee can collection. I’m very proud] |
On the desktop, I have all of my pattern-draft sharpies, rotary cutter, scissors, ruler, tracing wheel and pinking shears out and easy to grab! I found the awesome blue jars at an antique shop (love the color!) and put thread for current projects in one and kept the little one for a table top garbage can (snipping threads) – I usually use a coffee mug! The little white birdhouse is leftover from my wedding – there’s a clothespin glued to the back and I have it there to clip the power cord and foot pedal cord so they don’t slide down to the floor when I disconnect from the machine. I’m not sure if it’s visible, but Ike also had clear plastic desk mats for a few dollars, so I have that to go under the machine. And the little red sewing machine was my mom’s – she played with it when she was a little girl. It works! And I love that it’s red, but it may go back to live in my nook (more on that below), because I have a feeling it’s going to bug me and be in the way!
 |
| [mom’s toy sewing machine!] |
The top middle drawer isn’t the most useful, but it’s a good spot to stash my current pattern, some tape and notepaper. And my label maker!
 |
| [I my label-maker] |
On the right side, I found some wonderful magazine baskets at Michael’s for a super deal – they fit well and make everything more accessible! I have interfacing, my tailor’s ham, patterns and a few other things in the baskets. I’m sure they’ll fill right up. The little white box is my handsewing box – my pincushion, all my silk thread, thimble, small scissors and thread ripper live in that box. The coffee can is sewing machine supplies – oil and needles.
 |
| [more storage!] |
 |
| [A perfect basket! And black fur cuffs I got at an antique store, just waiting for the perfect project…] |
We also got a little set of hooks to store current projects. Here’s the Lady Grey in all it’s washed out muslin, scratchy glory….
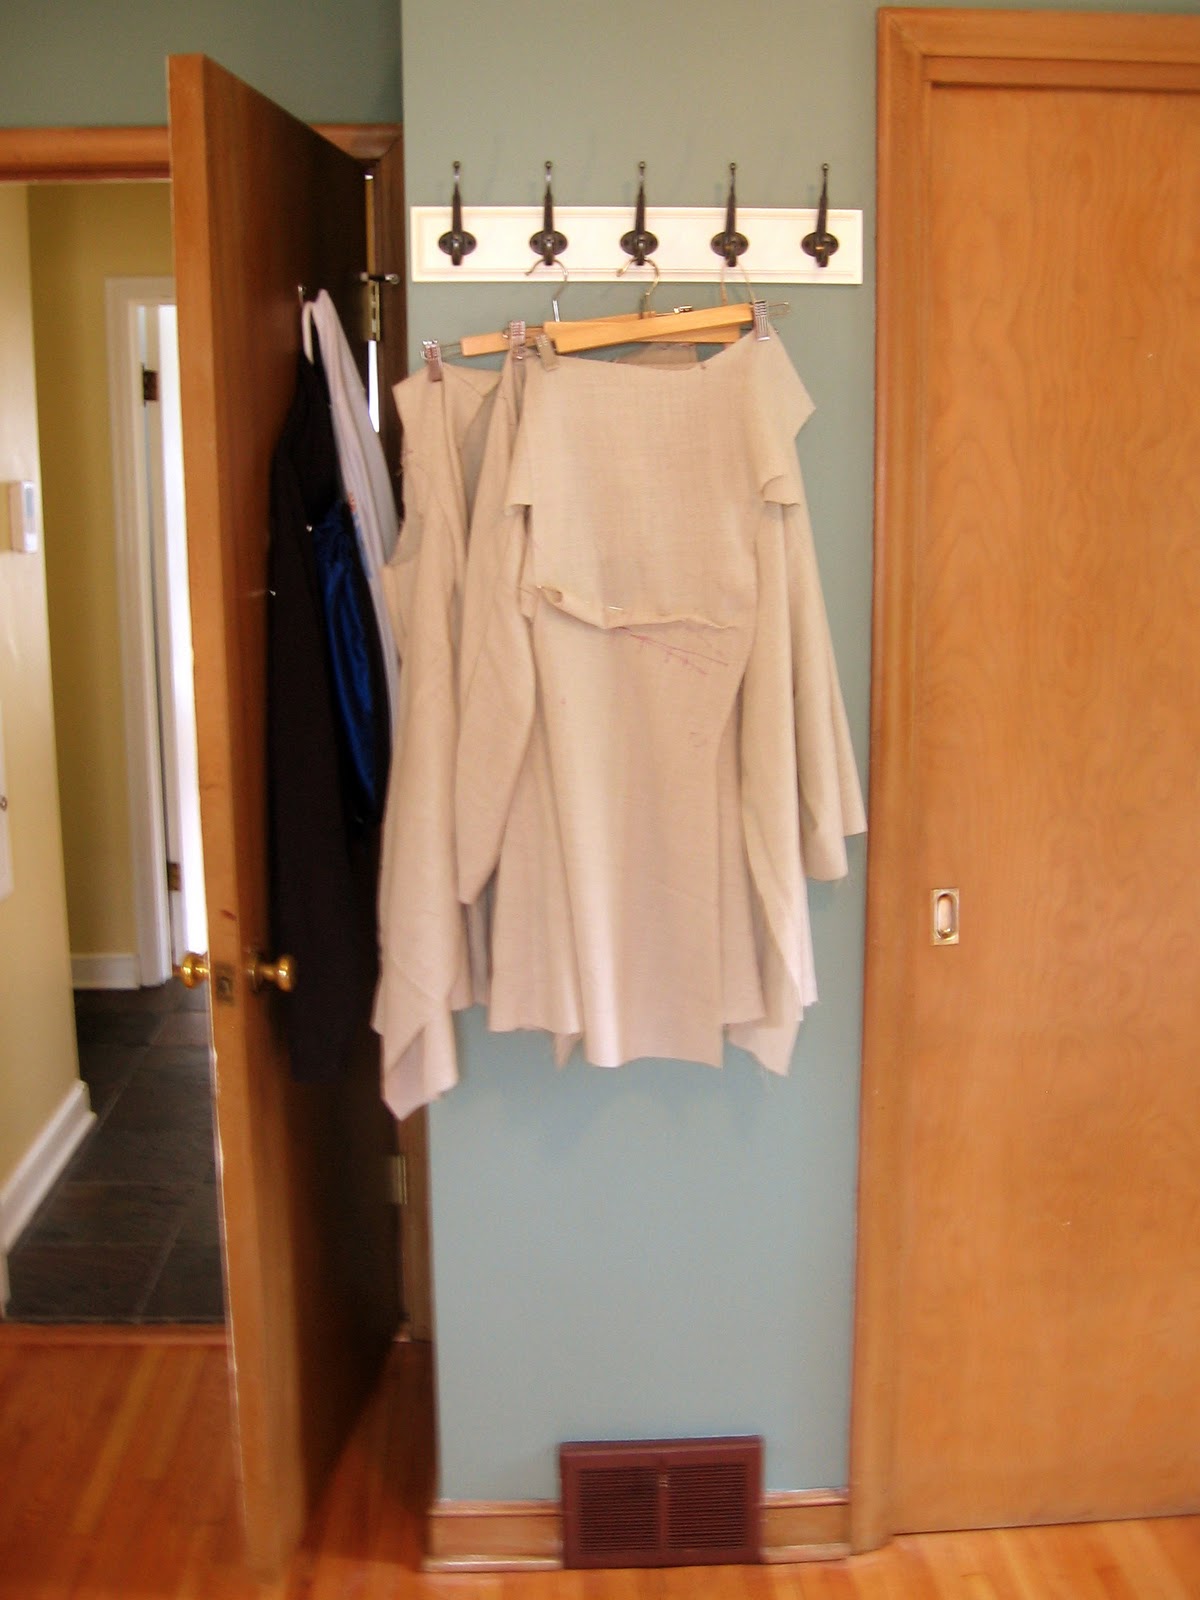 |
| [So sad.] |
 |
| [current, upstairs stash] |
I also have what we call the ‘nook’ in the basement. I basically built a clubhouse, taking a little 4 foot wide space, painting it and making a big curtain to add to the secret-garden feeling. All girls who see it love it. All boys get the hives. In the corner, I have a couple of Ikea Billy bookshelves with piles of fabric (nice and cleaned out due to our garage sale last weekend!) The white boxes hold things like shoulder pads, more interfacing, scrapbook materials (a very small stash) and jewelry making things.
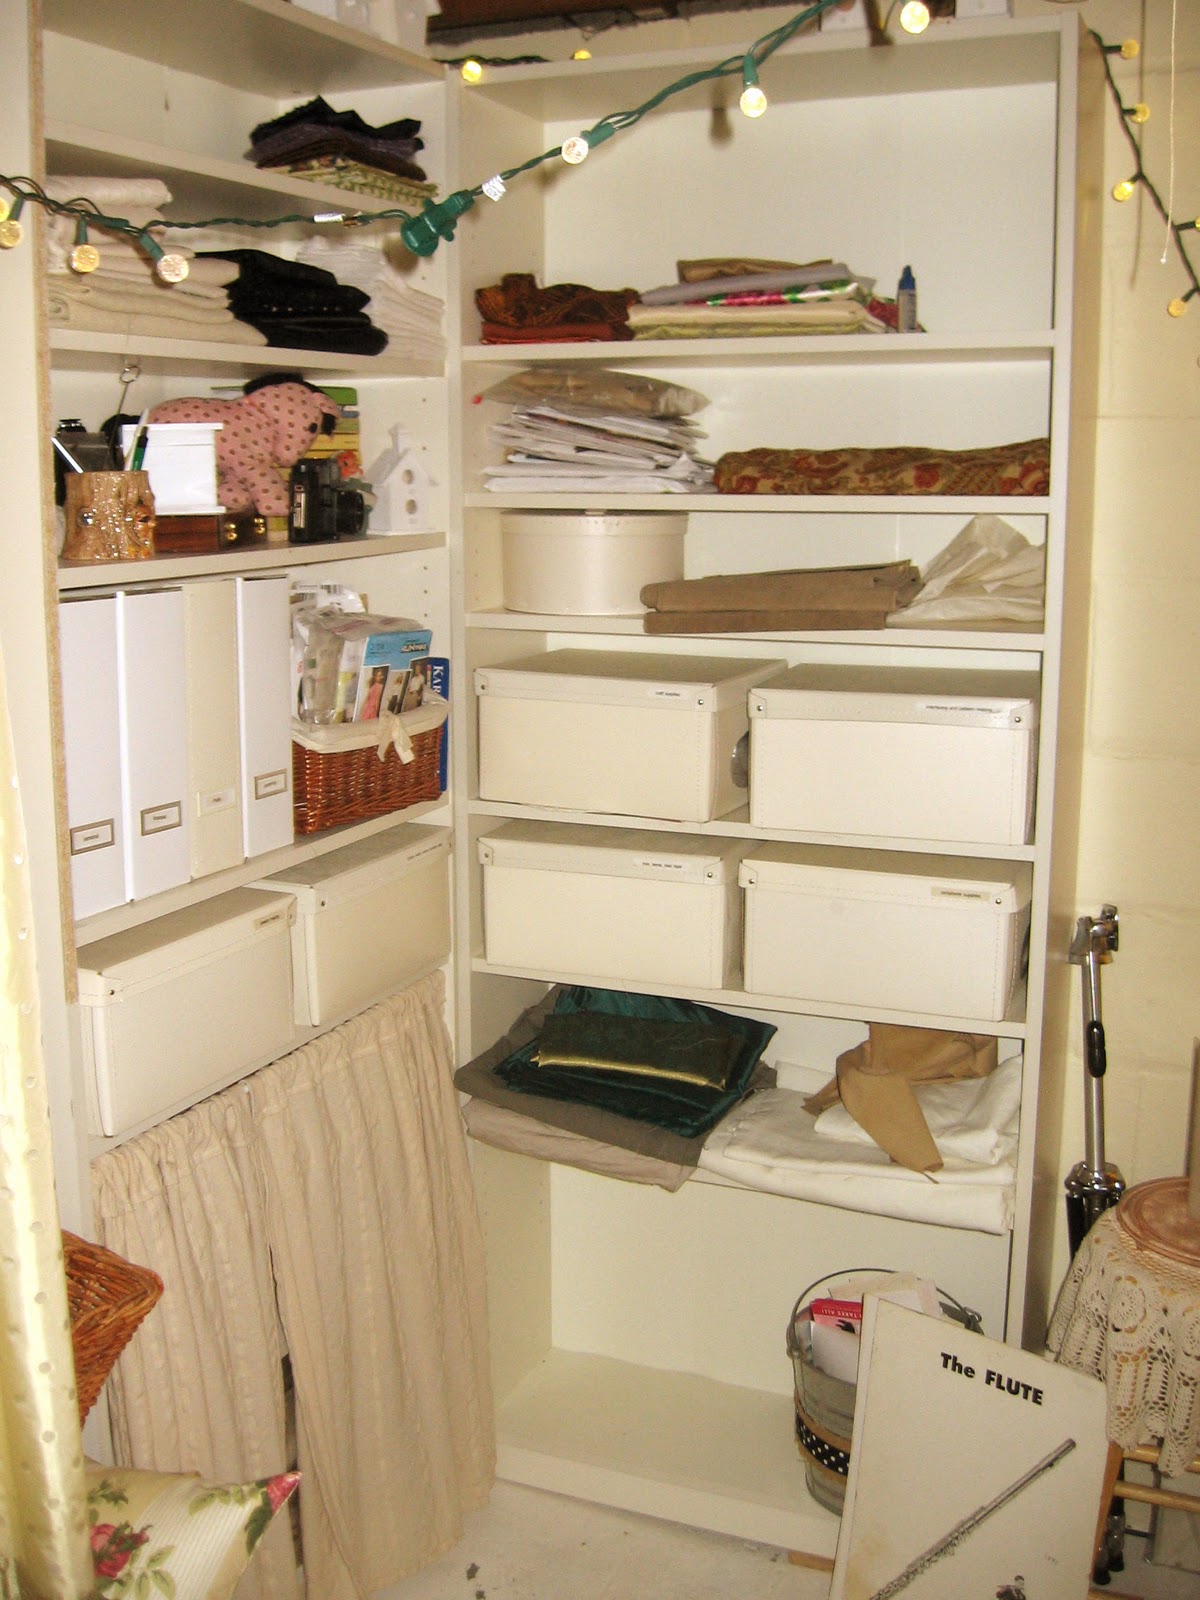 |
| [Christmas lights. Makes anything classier] |
 |
| [The other end of the nook. Completely gratuitous photos. Not related to current post or sewing at all. Hound rump!] |
In closing…
 |
| [sewing room disguised as guest room] |
>Weekend edition – A house and garden post – how to keep your basset hound from sitting on the kitchen table by building a window seat from Ikea Billy shelves
September 19, 2010 § 3 Comments
>Once again, I am interupting the normal self-stitching and lady grey-ing to bring you a house and garden post. I’ll be back to my regularly scheduled subject-matter come Monday…
Our basset hound, Lucy, yearns to live somewhere where she gets to eat bacon for every meal, instead of with us where she is forced to eat lamb and rice kibble and the occasional treat of lettuce leaves and sugar snap peas (and this morning, a dollar bill.) As such, she spends an inordinate amount of time staring out the window, looking for new humans to love her. It was hard to keep her off our kitchen table, which has a nice view of the street. After months of catching her sitting where she shouldn’t be, we decided to build her a window seat for proper viewing enjoyment.

This project was relatively easy, and the best part was the built-in look we achieved, using Ikea Billy bookshelves and some accessories from the Ikea kitchen section. This weekend’s post will cover our shopping list and prep for this project. Our finished unit is around 12 feet wide, with the window seat part around 110″ wide.
The Ikea shopping list
- Two Billy bookcases – 16″ x 80″
- Two Billy Wall units – 48″ x 14″
- At least one extra Billy shelf – (more to fit the shelving to your books – we bought a lot extra, because the entire left hand shelf is filled with the smaller mass-market books that are shorter. We probably have about five or six extra shelves, plus the one required to build the unit.)
- Three Billy height extension units – 16″ x 14″
- Three sets of the Akurum adjustable legs made for the built-in kitchen cabinets (in the kitchen section)
- Two Perfekt plinths. These are the toe kicks that are meant to go with the built in kitchen cabinets. Unlike most Ikea things, these aren’t picked up in the warehouse section, they are ordered in the kitchen section. If you’re not familiar with the Ikea kitchen section and how it works (we remodeled our kitchen with Ikea stuff, so we’re experts!), just go to where all the kitchen stuff is and find an ikea person and ask to order two toekicks. Tell them that you need them in the color to match your Billy color – we did our window seat in black/brown, so we needed Liljestad plinths. They should be able to figure out what you want. The mounting strips come with the toekicks and are super easy to use. You’ll place the order and can pay right there. Then find the legs (previous bullet point) in the kitchen section (hanging on the wall somewhere, they are black plastic, don’t get the pretty stainless ones, they aren’t meant to be used with toekicks**) and head down to the warehouse to pick up your Billy stuff. By the time you pay for your legs and Billys at the regular registers, your toekicks will probably be waiting for you in the pick up section – at our Ikea (Minneapolis) it’s by the return area. Just give them your order number and they’ll give you your toekicks.
** You don’t HAVE to use the black plastic feet and toekicks – you could skip both and instead get the pretty silver Capita legs, which are meant to be shown off and give more of a freestanding look. We wanted a built in look AND we have a tennis ball obsessed dog, so free-standing = tennis ball hiding zone and mad basset barking at us until we fish her toy out with a broom handle…
What to get from other places
- Approximately 250 books
- A big sheet of 1″ MDF, unfinished -I think the one I bought was four feet wide and eight feet tall. Ask the people at the store where you get it to cut into your seat width. Our seats are 15″ deep, which is a little shallow for an actual window seat – we wanted to conserve space and knew it would be mostly a basset hound perch. A more standard seat depth for a window seat is 17″ – 22″. You need enough length to cover your window seat. Our window seat is 110″ long, so a 4’x8′ sheet was more than enough.
- Some L-brackets – perhaps 2 for every three feet or so of window seat – the ones that look like this –

- Tools – um, a hand drill is helpful. You might need to cut your lengths of MDF down some more, so a saw could be helpful too (you might be able to get the store to do that for you too!), screws, a level, screwdrivers, probably a rubber mallet. A tape measure. A staple gun would be super helpful to cover the MDF, but pound-in two headed tacks would work too.
- Some high density foam. We got ours at Joanns, waiting for a sale. This stuff is sort of on the pricey side, so I definitely recommend waiting for a sale! We got the 3″ deep stuff. It’s very comfy, but if you want this for all-the-time seating, or for napping on, then I’d spring for the 4″ stuff. What we have is fine for the occasional perch for guests or snuggling with the hound. Much like the MDF, you can have this cut to size (usually) at the cutting counter at the store. If you opt to cut it at home, you’ll need a serrated knife, a lot of floor space, patience and a vacuum. It’s a mess. And annoying.
- Some sort of batting to wrap around the high density foam. The HD foam (the green stuff) is sort of sticky and would be hard to slide your seat covers over. I just got some cheap, super thin poly batting meant for cheap, super thin quilts.
- Enough fabric to make into seat cushion covers. Math will be required. Here’s how I normally figure out yardage – if your fabric has a repeating pattern (mine is a toile, so it did) you’ll have to adjust for the pattern (and if you sort of know what I’m talking about, I’m betting you know how to do that!). My method is pretty slapdash and I usually add at least a half yard to the number I come up with for accidents or bad math!

- Some sort of fabric to wrap the MDF seat base pieces in – the edge will show. We wrapped ours with burlap because it’s cheap and I like the look. We wrapped the top and all the edges, leaving the bottom exposed. If you are trying to skimp, you could just wrap the edges, or even paint the edges to coordinate. I know from previous experience that it’s hard to match the black-brown Billy color, so I used fabric. If you decide to use fabric, you can use the same formula as for the seat cushions – just keep the length of your seat and the width/length of the fabric in mind!

Once shopping is done, head home and assemble your Billy’s per the Ikea directions and set aside. Then figure out how long your window seat will be and if you will need to cut your MDF (the seat base) and high-density foam (for the cushion) into pieces. Our window seat is 110 inches long and we split the length into three seat cushions in order to make the best use of the repeating design of our toile – the middle cushion utilizes the entire width of the fabric, then I split the difference for the two side cushions.
 |
| [how we configured our seat cushion lengths] |
We decided to cut our MDF seat base pieces into the same lengths as the cushions, partially for looks, but also to distribute the weight more evenly across the span of our window seat!
Next weekend’s edition will cover assembly and the weekend following I’ll finish up with covering the cushions and seat bases.
PS – to keep us on task, here is a photo of what happens if you do not construct a windowseat…
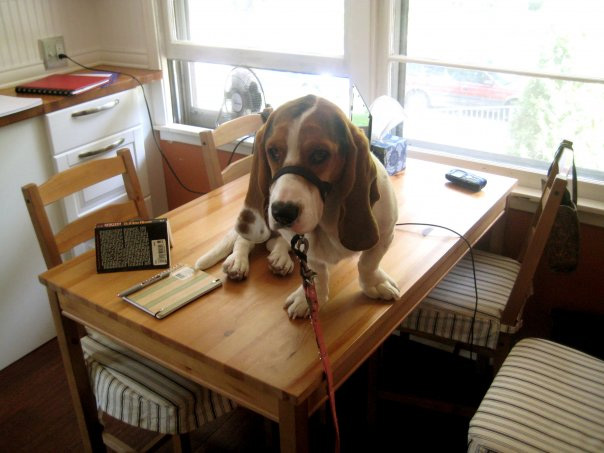 |
| [to be avoided at any cost] |
>A house and garden post – hallway, redone. And a Restoration Hardware knock-off project.
September 8, 2010 § 3 Comments
>I am interrupting my regularly-scheduled sewing-related blogging to bring a house-project post to you! If you aren’t into decorating, I’ll be back to sewing very soon!
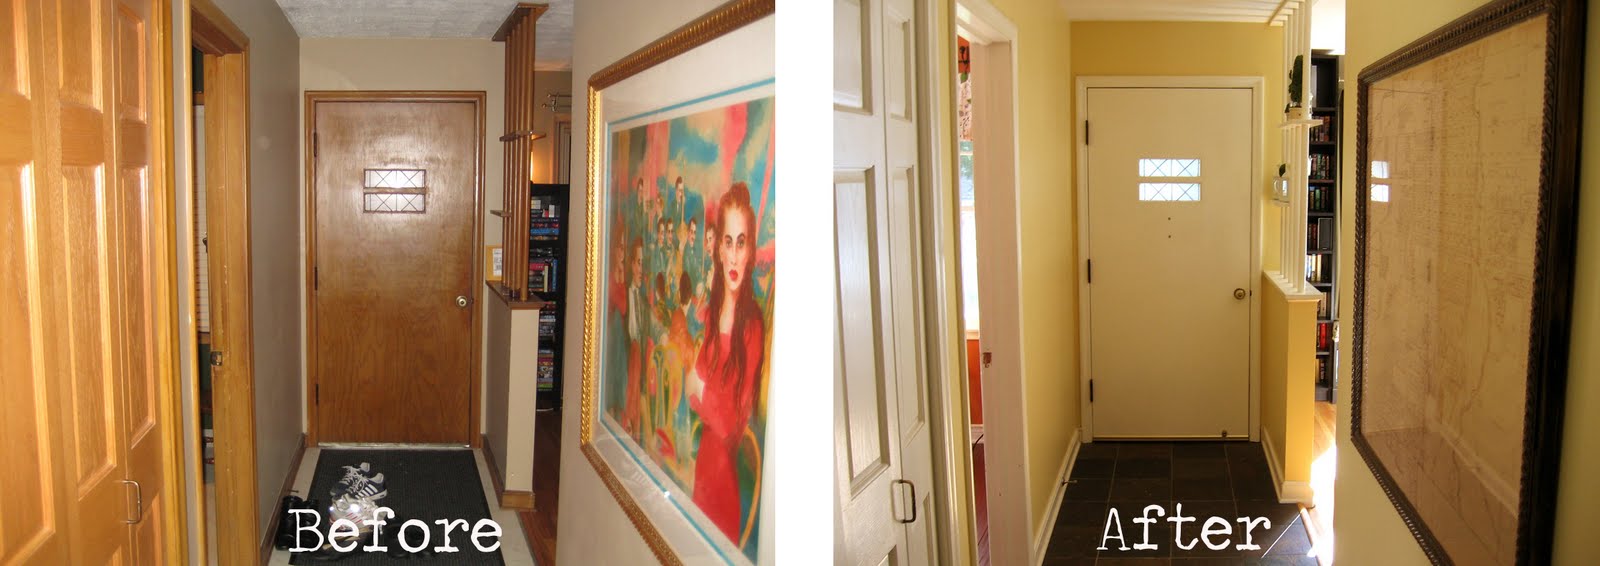
We bought our house in March of 2008. It was a good find, on the small side, but in a great neighborhood, with nice hardwood floors, lots of light and big closets. And a bathroom recently redone with travertine. The flooring in the hallway and kitchen was another story – a beatup, dingy white vinyl sheeting. And all of the trim in the house was the odd yellowish wood tone so popular in these 50’s homes.
We’ve done a lot of work over the past few years, redoing the kitchen, painting the woodwork white (I know, a sin, but the we weren’t repainting 8″ deep baseboards, just chintzy 50’s style trim!) Last year we pulled up the vinyl sheeting and tiled the hallway in slate (I blogged about it here).
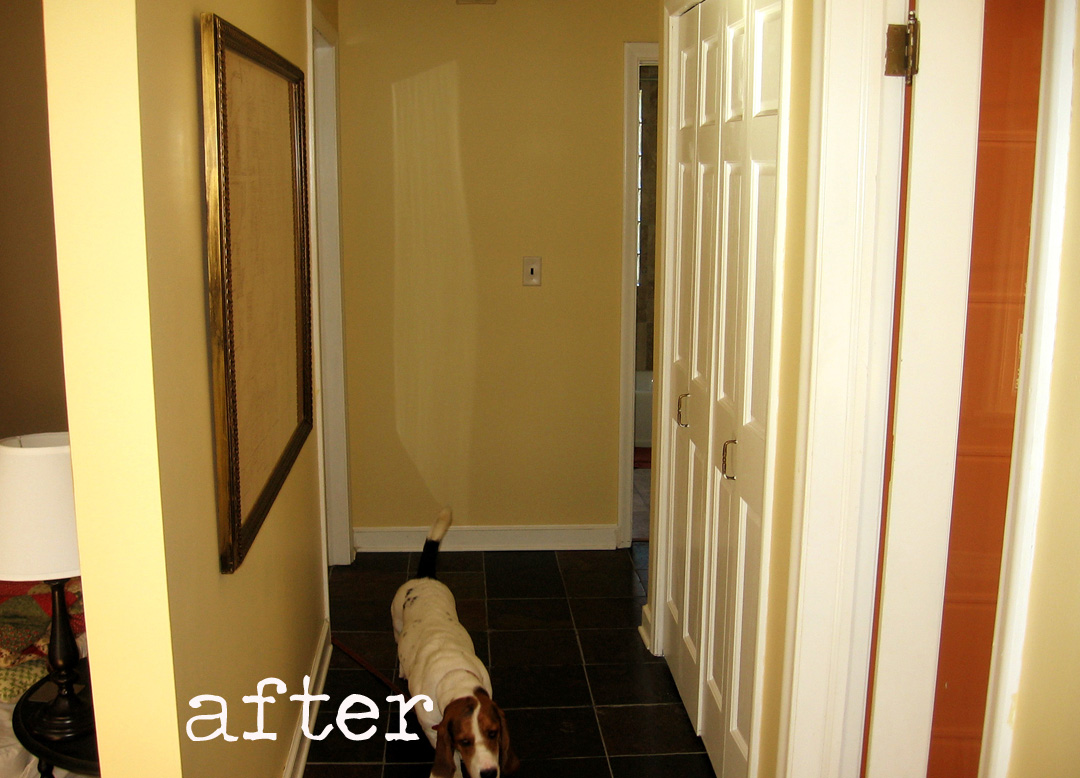
The color of the hallway continued to bother me. It was a very stylish mocha color (Brown Teepee from Home Depot) that the previous owner had chosen. I liked the color, but didn’t like how dark it made our hallway, which crosses through the center of our house. Last week we repainted with Benjamin Moore Straw. The difference is amazing! So cheery!

 |
| This print needs a new home.. |
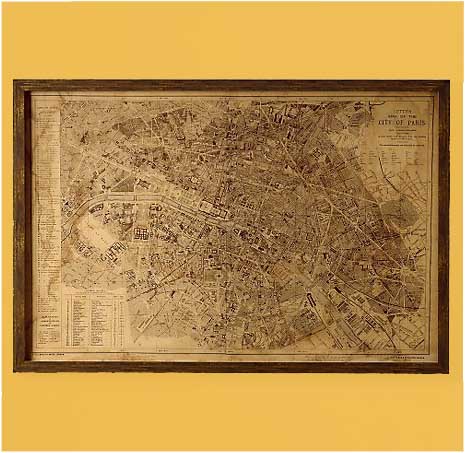
I dropped off the print and headed out to my antique shop, Hunt and Gather. I made a great find, a vintage plat map of a small town in Minnesota that was six feet wide and had the perfect look for our home! And it was only $20! I’ve seen similiar sorts of maps at other antique shops for $150 – granted, they were of the actual Minneapolis/St. Paul area (where we live) not of Faribault, which is an hour south of Minneapolis, but $20 was a steal!
Aging the frame
I wanted to take some of the shine off the frame, so I removed the backing and plexiglass and laid it out. I slathered it with Minwax Wood Stain in Ebony. I tried some mahongany Minwax Polyshades first (the kind with polyurethane already mixed in), but the color was too light and the polyurethane kept it from adhering at all. I think the frame is wood, with some sort of paint and poly coating already on it.
I applied the ebony stain, which is very, very nearly black, with a foam brush in a very thick coat. I used Painters Pyramids to hold the frame up off the work bench – very handy little painting helpers! I let the stain sit for about 20 minutes. I wiped the stain lightly off with torn up pieces of an old sheet**. I left a lot of the stain behind in the fairly elaborate carving on the frame. I wanted a very aged, almost black look, with just a bit of gold glinting here and there.
**a sewing connection! I sacrificed part of my muslin-sheet stash for a house-project!!
Dry time
According to the can, you can handle 8 hours after staining. I finished applying and wiping off the excess stain around 8 p.m. The next morning, around 10, the stain was still very, very sticky to the touch. I was concerned that I hadn’t done enough surface preparation (well, I didn’t do any). I opened up the garage door and set up a fan to help things along. I ended up letting the frame dry for almost 36 hours. I didn’t do a clear finish coat (too eager to hang up my new artwork!), and the frame feels very slippery, almost oily, but it held up well when I tried to scratch it with my car keys.
Mounting the artwork
While the frame had been drying, I had used the mat to outline the part of the plat map I thought looked the coolest, in consultation with Mr. Bug who was very opinionated on this matter! I cut out the part I wanted – the finished dimensions of the piece are about 48″ wide and 41″ tall. I decided to skip the mat. I don’t like the look of maps that are mounted with matting. Once everything was dried, plexiglass cleaned, both sides, I put it all back together. Finished!
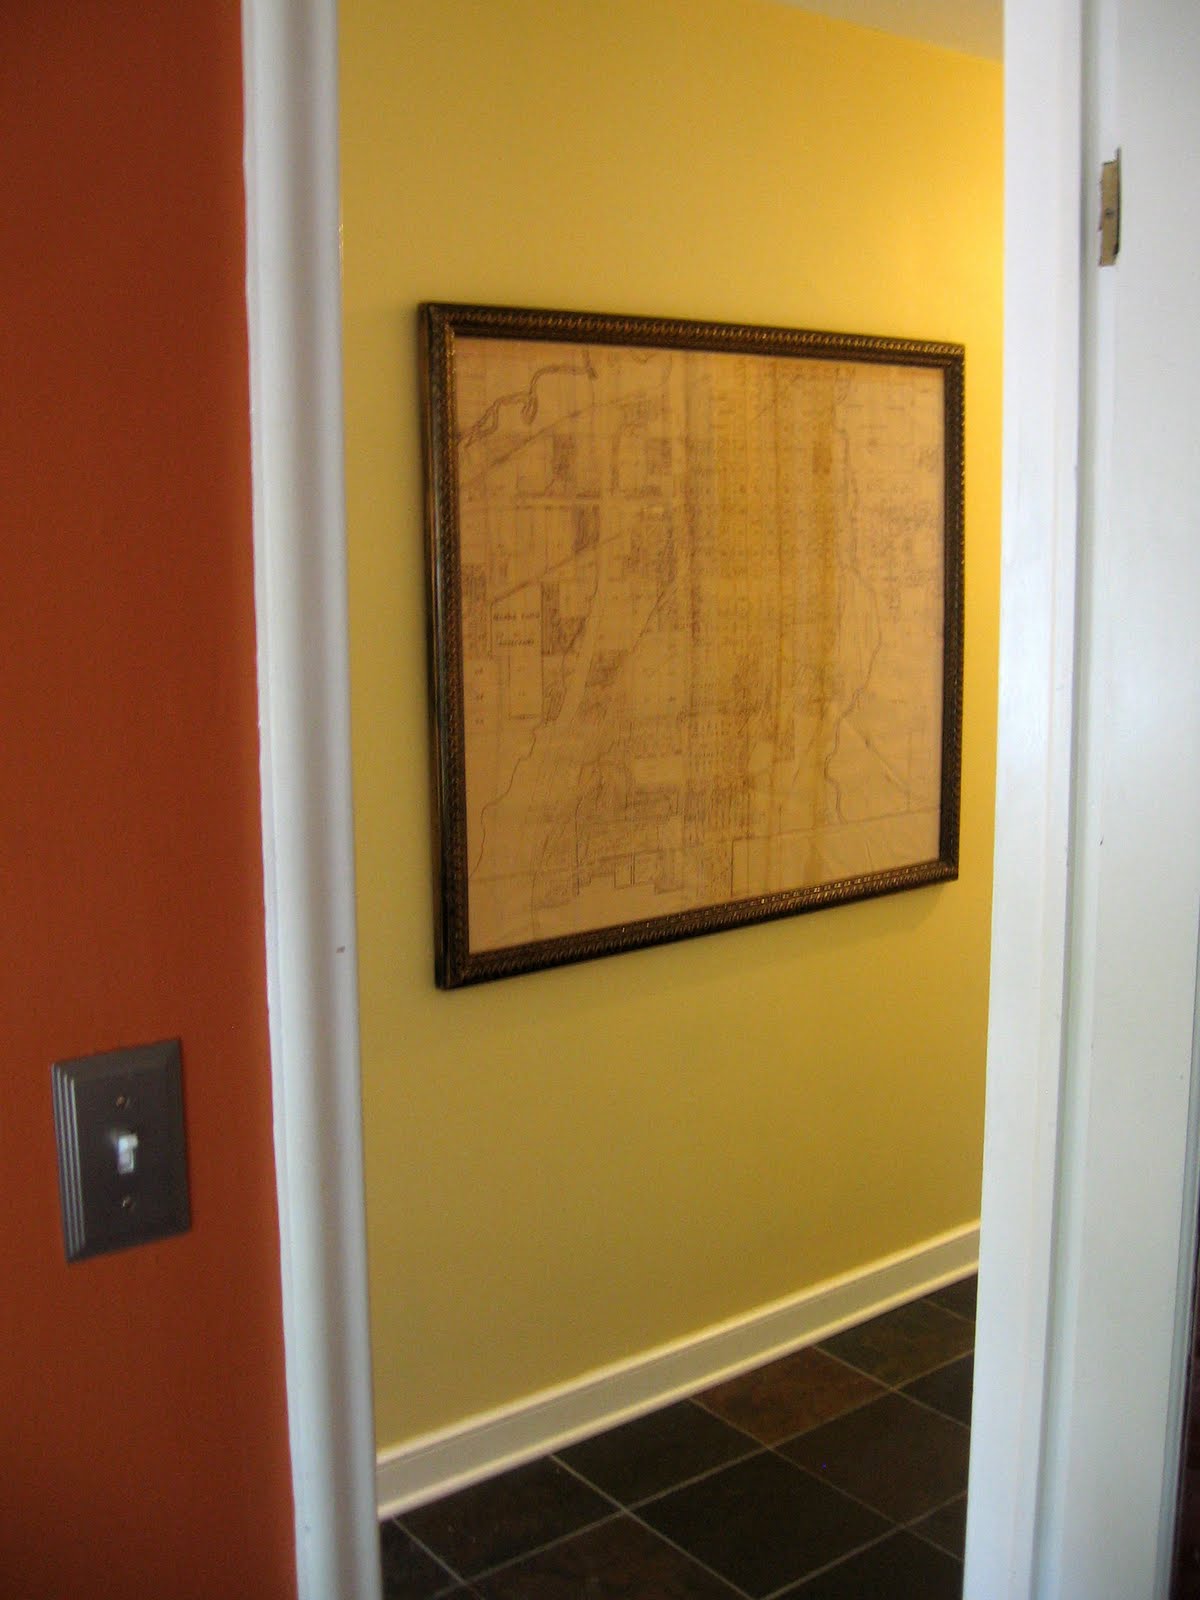 |
| New artwork! Cost = in the negative, with the commission from the old piece! |
Comparison shopping
Restoration Hardware is currently selling maps of London and Rome at their normal astronomical prices. Granted, they are maps of Paris and Rome, not Faribault, Minnesota. And they are reproductions from 16th and 18th century maps (and, OK, much larger than ours…), but they are REPRODUCTIONS! This one, of Paris in the Victorian era, is priced at $1795. I’ve adjusted the color of the wall in the background to allow a true comparison…
Yay for house projects!
>Table linens, bedroom paint and what to put in a china hutch
November 1, 2009 § 2 Comments
>Prior to officially setting our wedding date, we were working on updating our bedroom. I love our bedroom. The room is the perfect size for a queen size bed and a few tables, and there are some nice, big windows and long white curtain panels. This summer we planted some climbing roses in the backyard that will look perfect through the window. Where we will get married with our friends and our families and our basset hound cheering us on.
When we bought our house, part of what we liked was that the prior owner had painted all of the rooms in deep, saturated colors. Liked, and hated. While I had always lived in apartments and mostly had white walls, and was DYING for color, our prior owner loved dark colors. Really dark. Dark forest green in the kitchen, dark toffee in the living room. Dark navy teal in the bedroom. At first I really loved the bedroom, it was dark and cozy. Cozy and caevelike. Just what you want for your sleeping den… but now, not so much. So about a month ago, I started coming up with plans for new paint, new white trim, new white slipcovers for our somewhat odd bed, new white furniture… you get the picture. Beachy in Minnesota.
When plotting on furniture, I started to think about grandma’s china cabinet. It was in my mom’s garage for fifteen years and I’ve been dragging it around with me for the last fifteen years. Family lore (at least, what I remember) is that grandma borrowed it for a bridge party from a neighbor and never returned it. The china cabinet (dining set, secretary and Regulator clock) were HEAVILY coated with paint. Grandma LOVED to paint her furniture. I remember a variety of colors when I was a little girl, but the final color was a dark, dark green. With an ‘antique’ glazing technique. Plus fifteen years in a unheated, fairly wet garage and another fifteen years of paint chipping and frequent moves. Here’s what it looked like a month and a half ago:
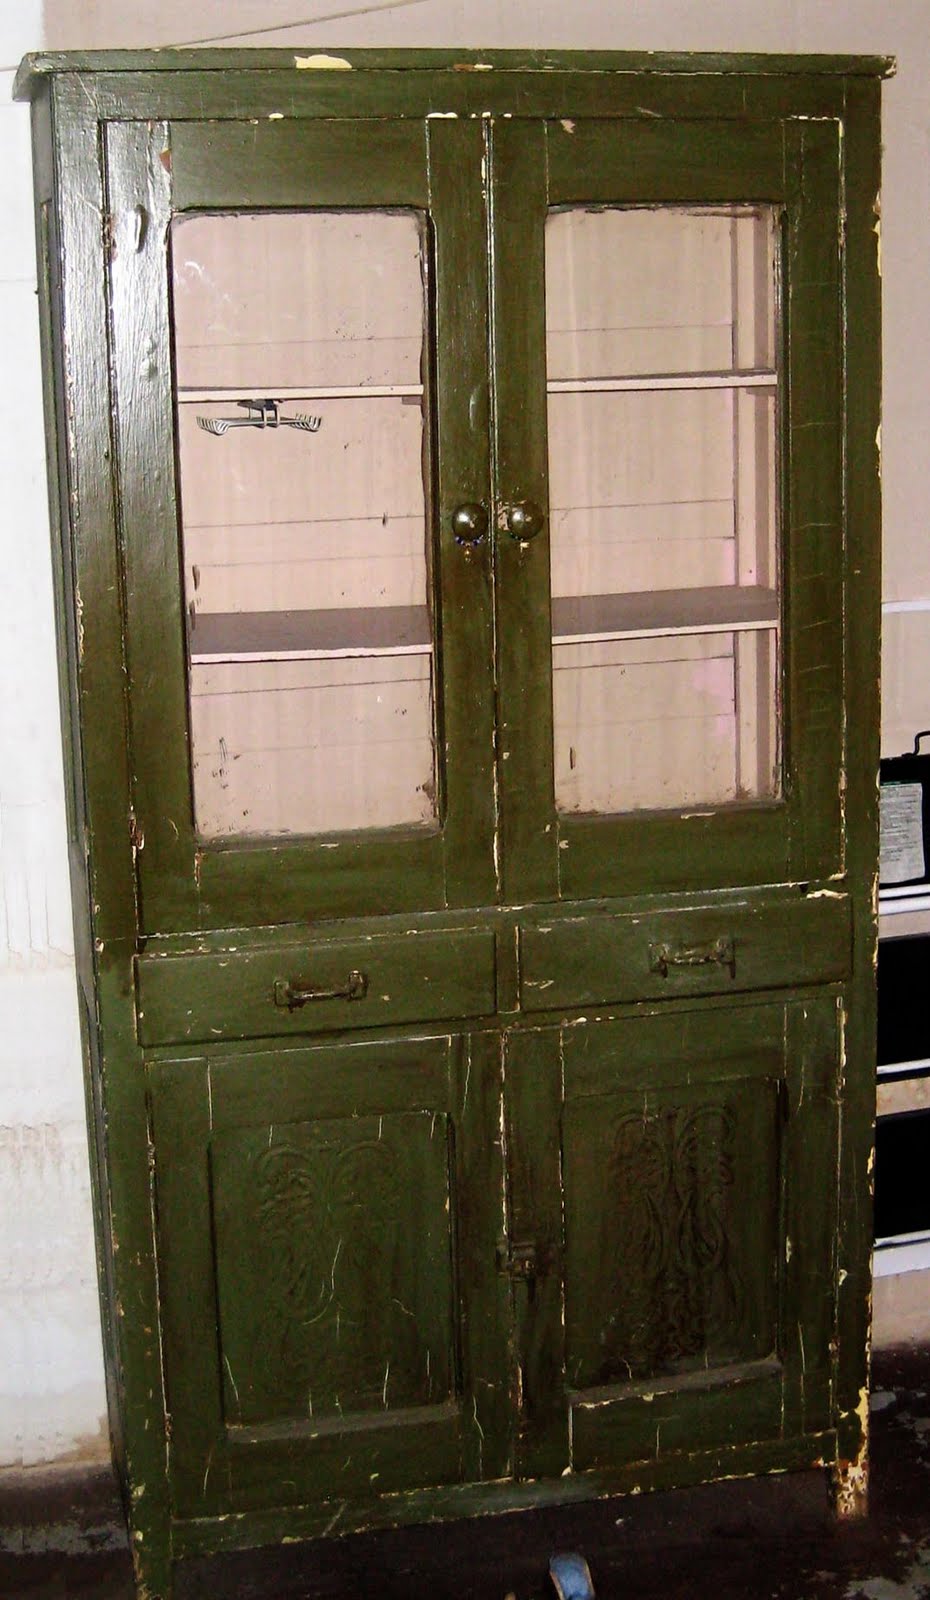
It’s not terrible. I actually liked the color and the shabby vibe it had. It looks more shabby in the photo than it did in real life. The worst part was the sort of musty smell on the inside that never really went away, no matter how many times I washed, how many bowls of vinegar I left to sit inside it or how many fabric softener sheets I tucked away to freshen things up. But even though I didn’t mind the look, the boy that I live with was not as enthusiastic about the granny-chic thing that it had going on, and when we moved into the house, the china cabinet was moved straight into the garage as a ‘maybe someday’ project, or possible garage sale offering.
So when I decided to freshen up our bedroom, I thought the china cabinet would fit perfectly and be BEAUTIFUL refinished. I took off the doors, slid the glass out, removed hardware, hinges and went to the hardware store for a can of paint remover. I got a little can of zip strip, maybe a quart. Turns out there was WAY more paint than I had anticipated. There was the green, a few coats of beige, a coat of pink, and then surprise! A coat of faux wood. A coat of red. Some pink, porceline blue, anda lot more beige. Grandma really, really liked to paint her furniture. Total tally was two small cans of zip strip, two large cans (a gallon?) and a somewhat large bottle of slightly more safe for the environment and definitely less burning to the skin citris stripper, which actually worked well, but had to sit for at least 30 minutes (versus 10 for zip strip). I decided I didn’t have the time to use the environmentally friendly variety. And I would wear long sleeves. I listened to the entire Twilight series on my iPod while stripping the china cabinet. All four books. But here it is in it’s finished glory!
 Check out that dark, dark blue on the walls!
We’re so thrilled with how it turned out! Since I love the rustic shabby vibe, I decided to just finish the cabinet with Waterlox (we had some left over from our spring kitchen remodel and the butcher block cabinets). Waterlox brings a beautiful, warm color to wood, and a great feel. There was a lot of patina left on the cabinet after the stripping. It’s still really evident on the cabinet, and a few of my friends are of the opinion that I should have stained the cabinet to even out the color.
I also got some great replacement knobs for the glass doors on sale at Anthropologie for $2.95 each. Grandma had replaced the original knobs with some clunky wood ones at some point which didn’t look great. The black ones are so cute!
I couldn’t really get the inside stripped very well. Bad angles, and the wood, which I think is birch, was really rough on the inside. I ended up painting the interior with a peach paint that I got on sale (an ‘oops’ can) for $5.00 at our local Ace. I sanded the corners and edges to give it a distressed look.
All in all, we love the china cabinet and can’t wait to finish the rest of the bedroom!
And a extra special part of the china cabinet in its current state is that it’s FILLED (well, not really, a little full) of linens I’ve started collecting at thrift stores for the wedding next year. We really want a casual garden vibe, and I’m on the hunt for white flat sheets as base tablecloths and a variety of yellow, cream, green and tea-stained tablecloths for the top layer. I did the tea staining myself on a couple of pieces of fabric, an eyelet and lace fabric that I liked the pattern and texture of, but one was a little dingy and the other was a little on the pinkish side. I’m loving the look of the fabric so far and have spent a little under $30, with about $15 worth of white sheets still on my shopping list. All at thrift shops for $2 to $6 dollars each. Rental costs would be around $200, so the thrift costs PLUS the personal look make me really, really excited!
>Not-quite built in bookshelves
October 6, 2009 § Leave a comment
>Books. I have too many of them, even though I make frequent trips to Half Price Books to recycle those destined to be read only once. I’m still left with a lot of books, and as with everything, if I’m going to keep them in the house, they need to be handy and accessible and organized in a soothing way!
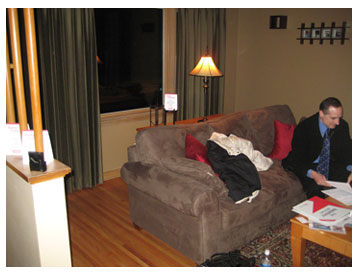
When we moved into our new house, we had a picture window and a new set of drapes just begging for two bookcases to flank the window. Here’s a picture of my fiance sitting in the living room reviewing some paperwork. This is the prior owner’s furniture. The window in need of some bookcase friends is in the background. Nice, but lonely.
 Once we moved our things in, we had two bookcases that had been in my possession for a few years. I really liked the look of them – the color, the trim – but they were short and fat. I had to double shelve my books as well as stack them flat in order to make the best use of the space. Not accessible at all. And the books stacked up always looked so MESSY to me! And to make matters worse, the placement and height of the drapes just accentuated how short the bookcases were…
 Ikea to the rescue! Even though Ikea furniture sometimes has funky measurement issues since it’s a Swedish company, apparently an 8 foot ceiling height is standard, so we were able to get the perfect height bookcases. The 16 inch wide Billy bookcases fit perfectly on either side of the window. Well, almost perfectly – we did have to trim about 1 inch off the window sill on the right side. The Billy bookcases are wonderful for books – only 11 inches deep, so they have a nice small footprint for those not wanting our books double shelved.
The bookcases are six feet, 7 inches tall. We added the Billy extenders to get another 13.75 inches of height.
Since the bookcases are so tall, it’s best to attach them to the wall. The bookcases come with an ‘L’ bracket to make that easy to do. We sacrificed some of our precious bookshelf real estate to shed some light in that part of the room, using the Grono table lamp. Love that lamp! It’s a glowing box of light! The height extenders for the Billy bookcase attach in the front, so it’s possible to slip the cord through the back. Even though these lights have an on/off switch on the cord, we were lucky and already had a nearby outlet wired to a switch on the wall, so these turn on with a flick of the switch.
The final addition was a few packages of extra bookshelves. I have a lot of paperback books, and wanted to maximize the height of these bookshelves as much as possible.
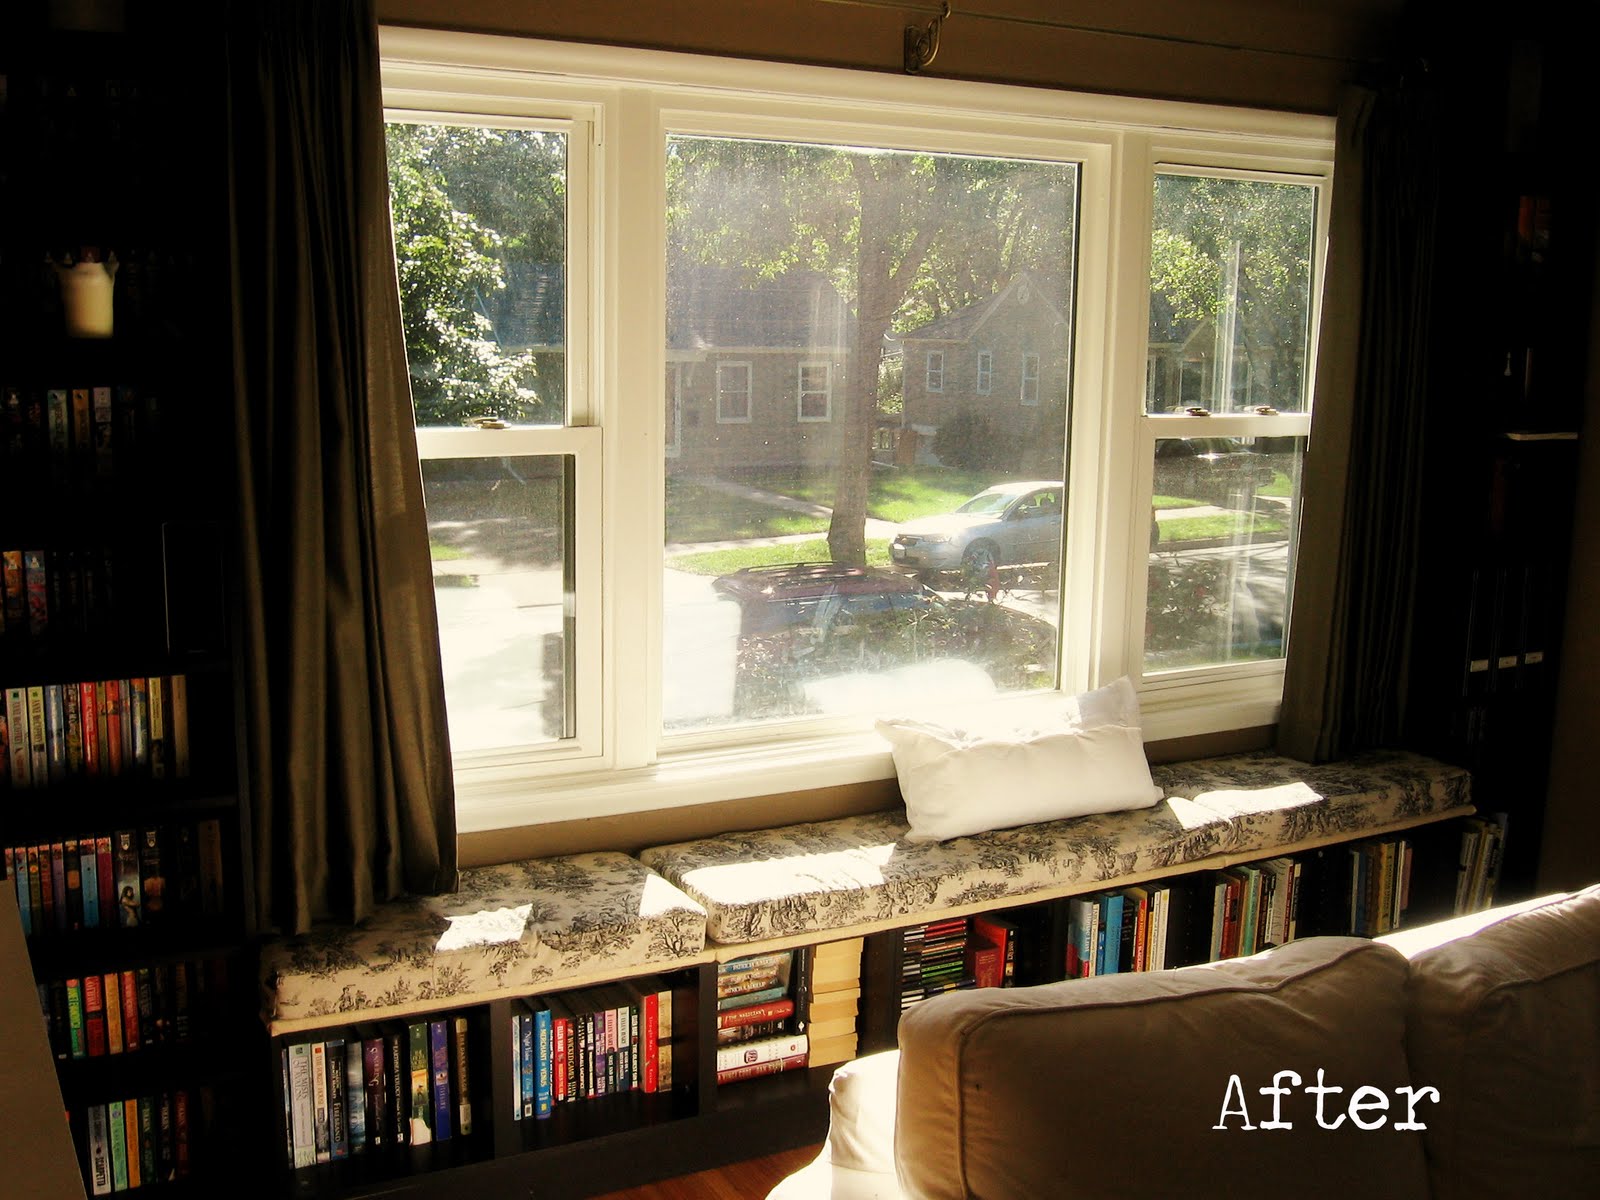
Here’s the end product! The spacing for us was perfect With widths available in 16 and 32 inches, and the extenders, these bookshelves can be adapted for many spaces for a built in look.

Total project cost:
Two Billy bookcases $140
2 Billy height extenders $40
3 Extra shelves $22.50
2 Lamps $0 (already had them)
2 Old bookcases sold via craigslist ($40.00)
Total cost $162.50
Tools required – none are absolutely required, but a rubber mallet and a cordless drill made the project go faster. I also used plastic drywall screw anchors that we had in our toolbox to attach the bookcases to the wall. One per bookcase.
Total time – it took about 30 minutes to assemble each bookcase (1 hour total) and about an hour to drag them around – oh so carefully, by myself on the hardwood floors! – and arrange them, get the drapery rods perfect, etc.
Worst Part of the project – dragging the boxes inside – they are heavy (around 50 pounds) and long. Hard to carry around!
Best part of the project – being able to find a book immediately, rather than having to pull out all the double shelved books to find the book I’m looking for!
